
Imagine that you work in a large organization, for instance, a large school system with hundreds of branches, or a multinational firm where new employees are hired every day. You get a list of new users to create in Active Directory every day; sometimes less than 10 and sometimes more than 100.
Typically, like most admins, you use the Active Directory Users and Computers console to create them. The process is easy and usually takes 2 to 3 minutes to create an AD user account. But there are some limitations that make the process lengthy and boring, such as using ADUC, you cannot add all the common details of the user being created (e.g., their department, manager, title, etc.). For that, you must open the properties of the newly created user and do all the steps manually. This takes a single user creation to almost 10 minutes, which makes hundreds of minutes if you get a large list of new employees.
In this blog, we will look into ways to shorten the time required to provision new users and, if possible, to bring automation into action.
Table Of Contents
-
Creating Users with ADUC
-
Creating Users with ADAC
-
New-ADUser Cmdlet
-
New-ADUser – Syntax
-
New-ADUser – Parameters
-
Creating a Single User Account by New-ADUser
-
Create a User Account in a Specific OU
-
Create User and Set Properties Beside Available Parameters
-
Create an inetOrgPerson User
-
Copying an Existing AD User Object
-
Creating Multiple User Accounts with a CSV File
-
Tools for User Creation in Active Directory
-
Conclusion
Creating Users with ADUC
The graphical ADUC console is the simplest way to add a new domain user to Active Directory.
- Open the ADUC console in any of the following ways:
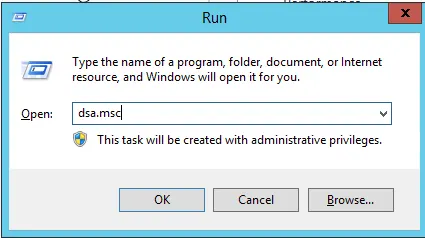
- Type “dsa.msc” in the Run dialog box and click OK.
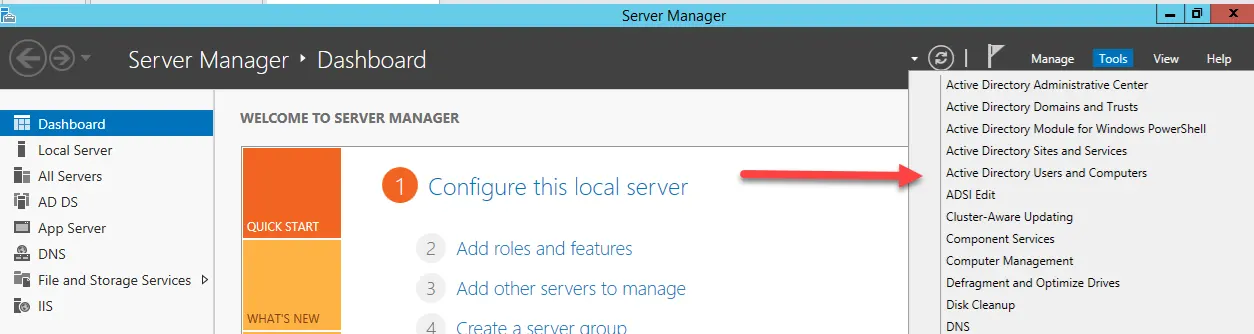
- Open the Server Manager and click Tools > Active Directory Users and Computers.
- Type “dsa.msc” in the Run dialog box and click OK.
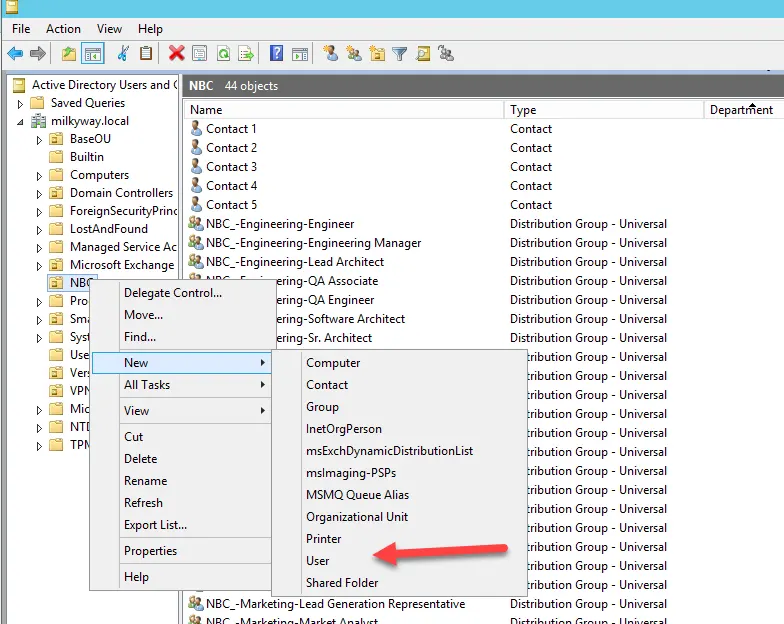
- Right-click the OU where you want to create the user and select New > User, as show below:
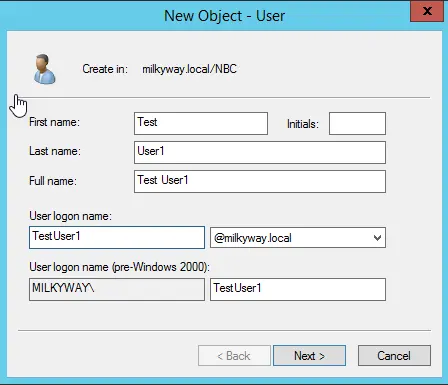
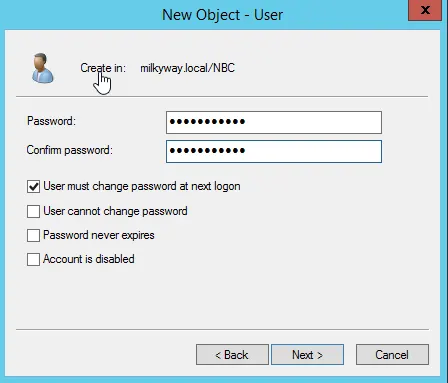
- In the New User Object window, enter the desired details and click Next.
- On the next page, provide the password and reenter it to confirm it. Select the desired password-related check boxes and click Next.
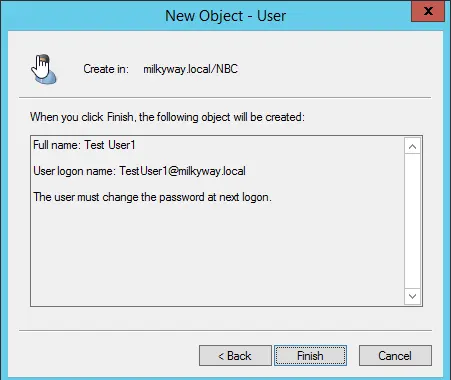
- The final page displays the details of the user being created, with the provided information and selections. Click Finish to create the user in Active Directory.
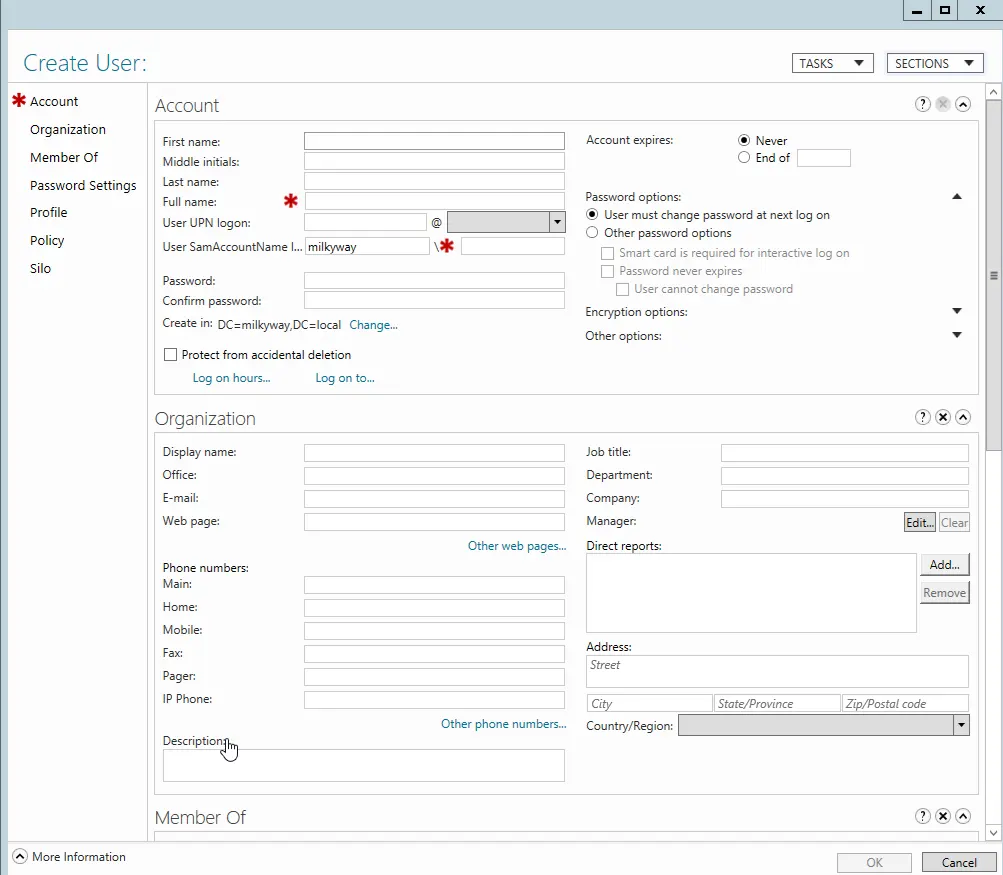
Creating Users with ADAC
Active Directory Administrative Center is another great tool for creating objects in Active Directory. It gives you a lot more options than ADUC. It gives you leverage to populate additional attributes of a user object (e.g., Department, Title, Manager, etc.) while creating the user.
- Open the ADAC console in any of the following ways:
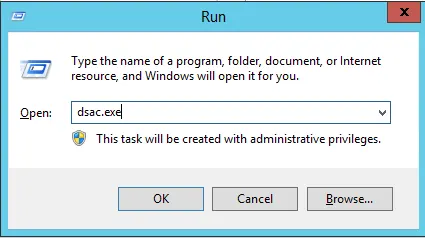
- Type “dsac.exe” in the Run dialog box.
- Open the Server Manager and click Tools > Active Directory Administrative Center.

- Type “dsac.exe” in the Run dialog box.
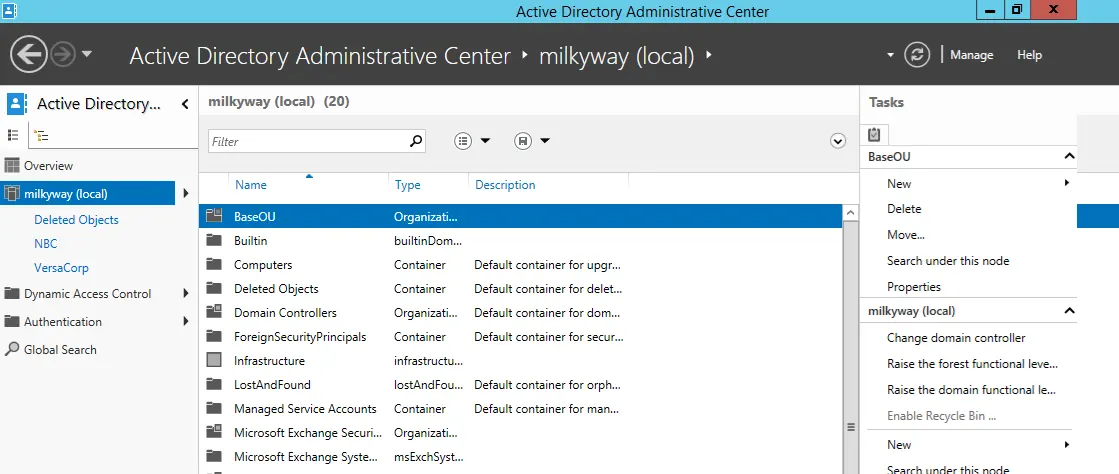
- The ADAC layout is shown below. You can see that it is way better than ADUC, giving you more options, such as:
- Search option
- Navigation within the domain or quick links to perform some common actions (see the right side).
- The following Create User window shows that there are many more options to configure while creating a user.
That is the point where you get tired of launching Active Directory Users and Computers (ADUC), fumbling with the keyboard, making mistakes, and creating a new user account for the sixth time.
Even today, both ADUC and ADAC lack the functionality to create users in bulk, which is why we have to opt for another useful option like PowerShell’s New-ADUser cmdlet to automate the incredibly popular process of adding users to Active Directory. You can create multiple users using a CSV file too with PowerShell.
New-ADUser Cmdlet
The New-ADUser command populates a user object in Active Directory. You can use certain parameters with this command to populate the most common user properties.
- Using the OtherAttributes parameter, you can change property values that aren’t related to cmdlet parameters. Make sure to enclose the attribute name in single quotes when using this parameter.
- To create a user, you must give the SamAccountName parameter.
- The container or organizational unit (OU) for the new user is specified by the Path parameter. When the Path option is not used, the cmdlet creates a user object in the domain’s default user object container.
The following techniques describe various ways to build an object using this cmdlet.
- With the New-ADUser command, provide the commonly used parameters and values and set any additional values by using the OtherAttributes parameter.
- You can also create a new user from a template. You can use the Instance parameter to create a new user or copy an existing one to the new object. The object used in the Instance parameter is used as a template.
- To create Active Directory user objects in bulk, combine the Import-Csv cmdlet with the New-ADUser cmdlet.
- Import a CSV file with a list of object properties to construct the custom objects using the Import-Csv cmdlet.
- The New-ADUser cmdlet can then be used to construct user objects by passing these objects through its pipeline.
New-ADUser – Syntax
The syntax of the New-ADUser cmdlet is as follows:
New-ADUser   [-WhatIf]   [-Confirm]   [-AccountExpirationDate ]   [-AccountNotDelegated ]   [-AccountPassword ]   [-AllowReversiblePasswordEncryption ]   [-AuthenticationPolicy ]   [-AuthenticationPolicySilo ]   [-AuthType ]   [-CannotChangePassword ]
   [-Certificates <X509Certificate[]>]   [-ChangePasswordAtLogon ]   [-City ]
   [-Company ]   [-CompoundIdentitySupported ]   [-Country ]
   [-Credential ]   [-Department ]   [-Description ]   [-DisplayName ]   [-Division ]   [-EmailAddress ]   [-EmployeeID ]   [-EmployeeNumber ]   [-Enabled ]   [-Fax ]   [-GivenName ]
   [-HomeDirectory ]   [-HomeDrive ]   [-HomePage ]   [-HomePhone ]
   [-Initials ]   [-Instance ]   [-KerberosEncryptionType ]   [-LogonWorkstations ]   [-Manager ]   [-MobilePhone ]   [-Name]    [-Office ]   [-OfficePhone ]
   [-Organization ]   [-OtherAttributes ]   [-OtherName ]   [-PassThru]
   [-PasswordNeverExpires ]   [-PasswordNotRequired ]   [-Path ]
   [-POBox ]   [-PostalCode ]   [-PrincipalsAllowedToDelegateToAccount <ADPrincipal[]>]   [-ProfilePath ]   [-SamAccountName ]   [-ScriptPath ]
   [-Server ]   [-ServicePrincipalNames <String[]>]   [-SmartcardLogonRequired ]
   [-State ]   [-StreetAddress ]   [-Surname ]   [-Title ]   [-TrustedForDelegation ]   [-Type ]   [-UserPrincipalName ]
New-ADUser – Parameters
There are more than 60 parameters for the New-ADUser cmdlet. Here, we would talk about the most common parameters used to create and update user account information.
| Parameter | Description |
|---|---|
| WhatIf | Used to see what the output of the cmdlet will be. |
| Confirm | Can be used to get a prompt for confirmation to run the cmdlet. |
| AccountExpirationDate | Used to specify the account expiration date. |
| AccountPassword | Specifies the password for new user account. |
| AuthType | Used to select the authentication type when running the command. |
| CannotChangePassword | Can be used to prevent a user object from changing the password; usually used for service accounts. |
| ChangePasswordAtLogon | Can be used to force a user account to change the password at the next login. |
| City | Used to update the city of the user. |
| Company | To update the company of the user account. |
| Country | To update the country attribute of the user account. |
| Credential | Used to run the command with alternative credentials. |
| Department | To update the user’s department. |
| Description | To update the description for the user account. |
| DisplayName | To update the display name of the account. |
| EmailAddress | To update the email address of the user account. |
| EmployeeID | To update the employee ID of the user account. |
| Enabled | Use this parameter to enable a user account. |
| Instance | This is an important parameter. It is used to create a user account with a template user that already exists in AD. For example, you want to create a user with the same properties as that of an existing user, such as the same department, title, and company. |
| Manager | Used to update the manager of the user account. |
| Office | Used to update the office attribute of the user account. |
| Organization | Can be used to update the user’s organization. |
| OtherAttributes | This parameter is also an important one. If there is no parameter to update an attribute, such as the extensionAttribute1 to 15 attributes, you can use the OtherAttributes parameter to update them. |
| PasswordNeverExpires | Can be used to force a user’s account password to never expire. |
| PasswordNotRequired | This is used for accounts that you want to create without a password requirement, such as service accounts. |
| Path | An important parameter which is used to specify the OU path to create the user accounts in. |
| SamAccountName | To specify the user’s Security Accounts Manager name. |
| Server | An important parameter that is used to connect to an alternative DC while running the command. |
| State | To update the user’s state. |
| StreetAddress | To update the user’s address. |
| Title | To update the user’s title. |
| Type | An important parameter used to define the user object type, e.g., normal user or an inetOrgPerson user. |
| UserPrincipalName | To update the userPrincipalName of the user account. |
Creating a Single User Account by New-ADUser
To create a new user account in AD, the simplest scenario is to specify its name only. It is as shown below.
New-ADUser JackNicholson
The above command will only create the user but not show any output. To view the properties of the newly created user, use the following command:
Get-ADUser JackNicholson
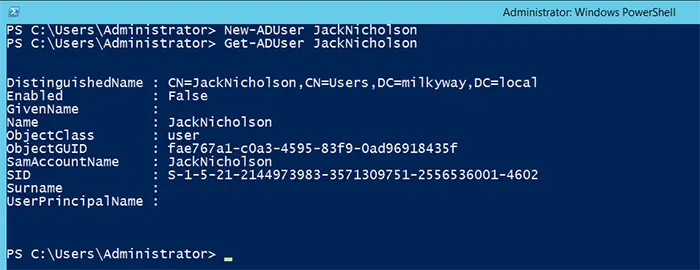
The above approach is the quickest but not recommended because:
- It creates the user as disabled.
- It does not populate all the required attributes.
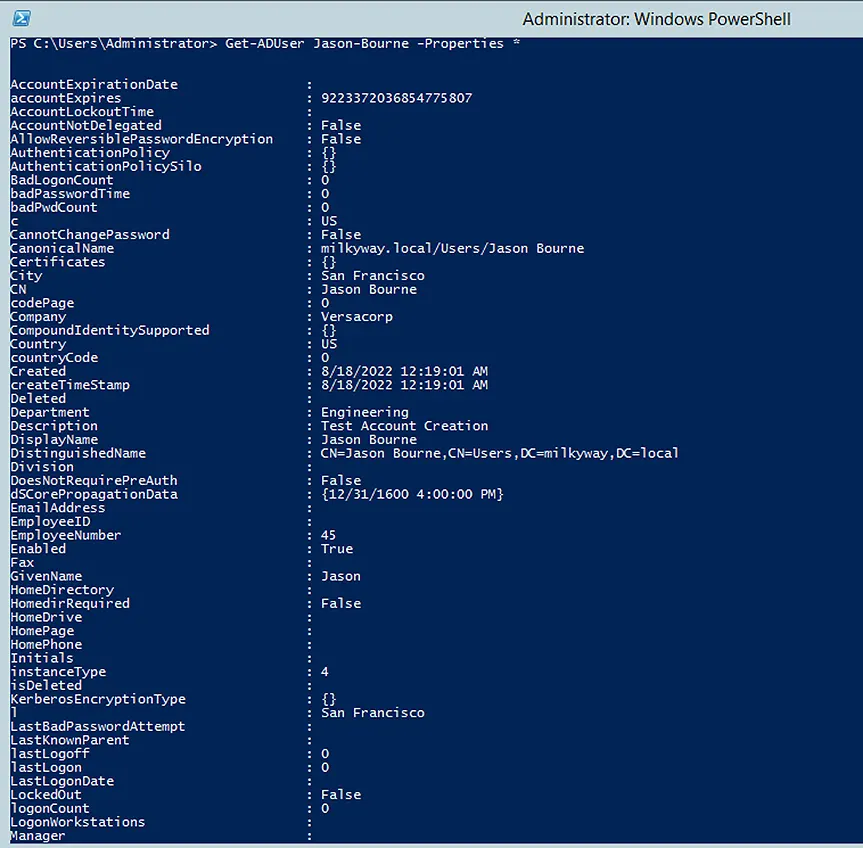
To create a full-fledged user account with many properties, use the following command.
New-ADUser -Name "Jason Bourne" -GivenName "Jason" -Surname "Bourne" -SamAccountName "Jason-Bourne" -AccountPassword (ConvertTo-SecureString -AsPlainText “webdir123R” -Force) -ChangePasswordAtLogon $True -Company "Versacorp" -Title "CEO" -State "California" -City "San Francisco" -Description "Test Account Creation" -EmployeeNumber "45" -Department "Engineering" -DisplayName "Jason Bourne" -Country "US" -PostalCode "94001" -Enabled $True
The above command will create a user in the default user container under the domain. This is because we did not provide the location where this new user should be created. We will use the parameter for location later in another example.
You can check the properties of the newly created user with the following command.
Get-ADUser Jason-Bourne -Properties *

Another way of looking at the new user’s properties is to fetch the desired properties only, as shown below.
Get-ADUser -Identity Jason-bourne -Properties * | select name,samaccountname,company,title,department,city,state,country,description,employeenumber,postalcode

Create a User Account in a Specific OU
When a location is not specified, then by default, the New-ADUser command creates the new user in the “Users” container under the domain.
To create the user in a specific OU, use the -Path parameter and specify its value as the distinguished name of the OU where you want to create. Use the following command.
New-ADUser -Name "Jason Bourne" -Path "OU=NBC,DC=milkyway,DC=local" -GivenName "Jason" -Surname "Bourne" -SamAccountName "Jason-Bourne" -AccountPassword (ConvertTo-SecureString -AsPlainText “webdir123R” -Force ) -ChangePasswordAtLogon $True -DisplayName "Jason Bourne" -Enabled $True
You can check the properties again by using the following command.
Get-ADUser Jason-Bourne -Properties *
Create User and Set Properties Beside Available Parameters
New-ADUser has more than fifty parameters to populate almost all the common attributes of a newly created user. Yet still there are plenty of uncommon or rarely used attributes, which vary company to company, such as custom attributes, car license, etc. To populate those attributes, New-ADUser has a parameter named -OtherAttributes. Following is an example.
New-ADUser -Name "Jason Bourne" -Path "OU=NBC,DC=milkyway,DC=local" -GivenName "Jason" -Surname "Bourne" -SamAccountName "Jason-Bourne" -AccountPassword (ConvertTo-SecureString -AsPlainText “webdir123R” -Force ) -ChangePasswordAtLogon $True -DisplayName "Jason Bourne" -Enabled $True -OtherAttributes @{'extensionattribute1'="director";'carlicense'="LWG3852"}
Let’s verify the results using the Get-ADUser command, as shown below.
Get-ADUser -Identity Jason-bourne -Properties * | select name,extensionattribute1,carlicense

Create an inetOrgPerson User
The purpose of creating user accounts is to give your users a way to log on to the network. A user’s properties control the following:
- The user’s level of access to the network.
- Network services for the user account.
- Password, account expiration, and smart card login requirement.
- The user’s home folder network path.
A new object type, inetOrg-Person, was introduced in Active Directory 2003, which is the same as the user object type almost in every way, but it is used as a standard by RFC 2798 to be used in all other directory services too. The inetOrgPerson user type is brought into Active Directory to facilitate integration with other products or to migrate the users into Active Directory.
You can use the following example to create an inetOrgPerson user account. It’s pretty much the same with just the addition of the -Type parameter, which has inetOrgPerson as its value. It is as shown below.
New-ADUser -Name "Benedict Cumberbatch" -Path "OU=NBC,DC=milkyway,DC=local" -GivenName "Benedict" -Surname "Cumberbatch" -SamAccountName "Benedict.Cumberbatch" -AccountPassword (ConvertTo-SecureString -AsPlainText “webdir123R” -Force ) -ChangePasswordAtLogon $True -DisplayName "Benedict Cumberbatch" -Enabled $True -Type iNetOrgPerson
The yellow highlighted part in the cmdlet defines the nature of the user account.
In the following screenshot, notice the type of the newly created user, Benedict Cumberbatch, and a previously created user, Jason Bourne.

Copying an Existing AD User Object
Sometimes you have a user in AD with almost all common properties populated, and you want all of them in a new user. You can do that by creating a template for the source user and then using that template to create new users.
Use the following script to create a new user with the same properties as the template user.
$temp_UserAccount = Get-ADUser -Identity Benedict.Cumberbatch -Properties State,Department,Country,City,title

$temp_UserAccount.UserPrincipalName = $null
- First, we have created a template with the properties of the user “Bededict Cumberbatch”. Notice that we have used Get-ADUser to get the user and its properties, namely state, department, country, city, and title.
- In the second line, we have used the value as null for the userPrincipalName attribute because this is a unique attribute forest-wide.
Now see the following.
New-ADUser -Instance $temp_UserAccount -Name 'Nelson Mendela' -SamAccountName 'Nelson.Mendela' -AccountPassword (Read-Host -AsSecureString "Input User Password") -Enabled $True
- The above command uses the -Instance parameter with the $temp_UserAccount variable, in which we have stored the properties of the existing user.
- Then we have provided some of the unique and required properties for the new user, such as Name, samAccountName, password, and then enabled it.
The command creates the user behind the scenes and does not show the output in the PowerShell console. We will use the Get-ADUser command to see the newly created user.
Get-ADUser -Identity Nelson.Mendela -Properties * | select `name,department,city,country,title,state
You can see that I have used PowerShell integrated scripting environment and ran all the above cmdlets one by one. The results are shown in the bottom PowerShell console. Notice that the newly created user has all the properties similar to Benedict Cumberbatch.

Creating Multiple User Accounts with a CSV File
Let’s assume the HR department hands you a CSV file with the details of all the users that need to be created on a daily or weekly basis. The file will look like the one shown below.

This file contains the most common attributes for the users, e.g., City, Address, State, Department, and Email, along with a column with the OU where each user will be created.
You can open the CSV file in Microsoft Excel for better formatting, but the actual file will look like something as shown below in notepad with commas delimited.

Now we will first import the CSV file into a variable with each record as a separate line, as shown below.
$import_users = Import-Csv -Path c:\bulkuser.csv
Then we will use the following cmdlet to create the users with even their passwords picked from the source file, then converted into a secure string and encrypted. For common attributes, like Name or Display Name, we can give the condition as First Name, then space, and then Surname. The same goes for Display Name.
$import_users | ForEach-Object {New-ADUser -Name $($_.First + " " + $_.Last) -GivenName $_.First -Surname $_.Last -Department $_.Department -State $_.State -EmployeeID $_.EmployeeID -DisplayName $($_.First + " " + $_.Last) -Office $_.OfficeName -UserPrincipalName $_.UserPrincipalName -SamAccountName $_.samAccountName -AccountPassword $(ConvertTo-SecureString $_.Password -AsPlainText -Force) -City $_.City -StreetAddress $_.Address -Title $_.Title -Company $_.Company -EMailAddress $_.Email -Path $_.OU -Enabled $True}

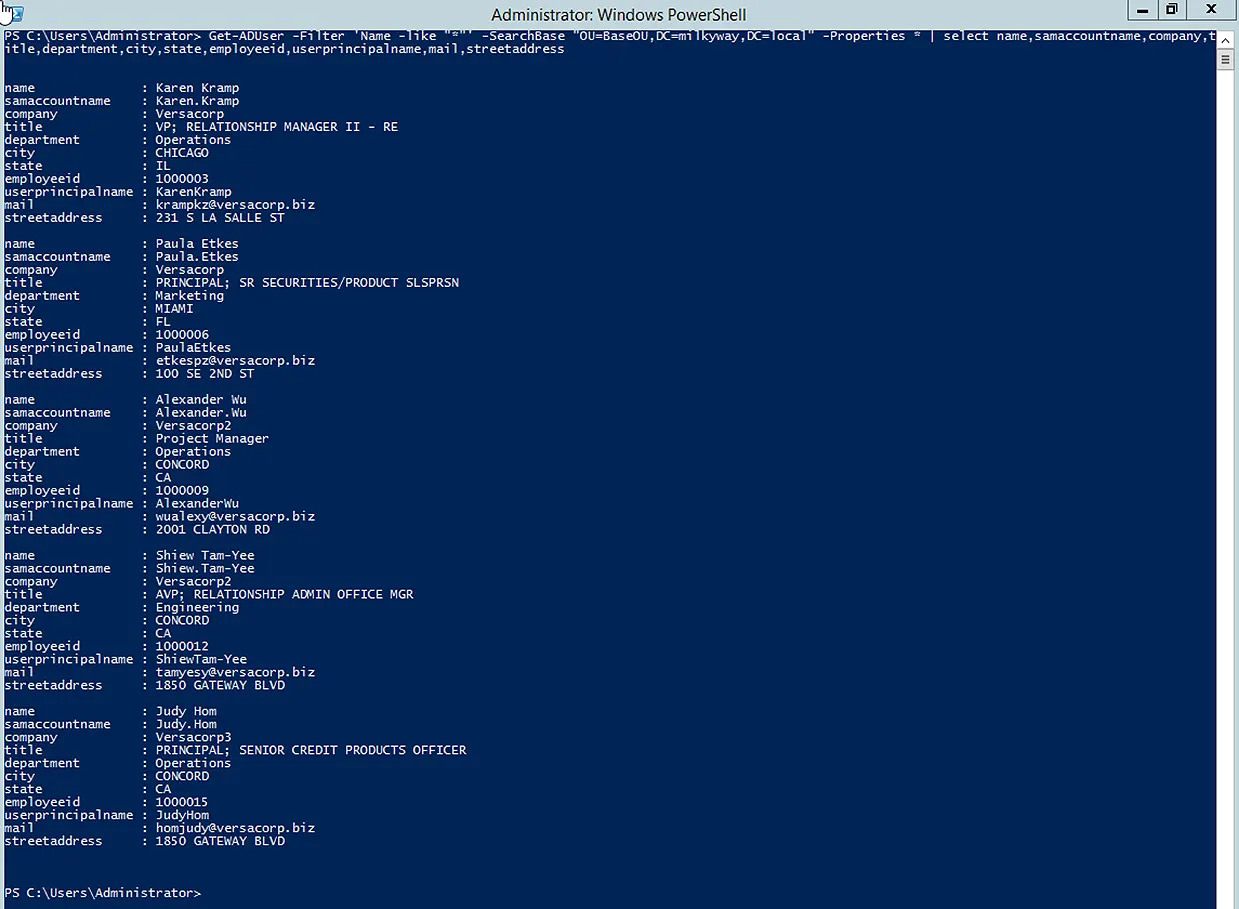
The above script will not show any output as it creates the users only. We will use the following command to look for the newly created users and their properties.
Get-ADUser -Filter 'Name -like "*"' -SearchBase "OU=BaseOU,DC=milkyway,DC=local" -Properties * | select name,samaccountname,title,department,city,state,employeeid,userprincipalname,mail,streetaddress
Tools for User Creation in Active Directory
When it comes to real automation, companies have a requirement to provision and de-provision users on a daily basis, which involves a complete user lifecycle, including:
- Employee provision and their account creation in Active Directory.
- Management of their account’s addition or removal from group memberships based on their identity, required access, and permissions.
- Employee deprovision and disabling their account in the directory while revoking all permissions
GroupID Synchronize is a synchronization engine that enables administrators to move data from one data source to another. The data sources could be files, databases, and directory servers. You can build Synchronize jobs to provision and de-provision users in Active Directory or synchronize many data sources using a very user-friendly GUI.
Synchronize also allows you to apply transformations to your data, which enables data conversion after being retrieved from the source but before being saved at the destination.
Synchronize Supported Providers
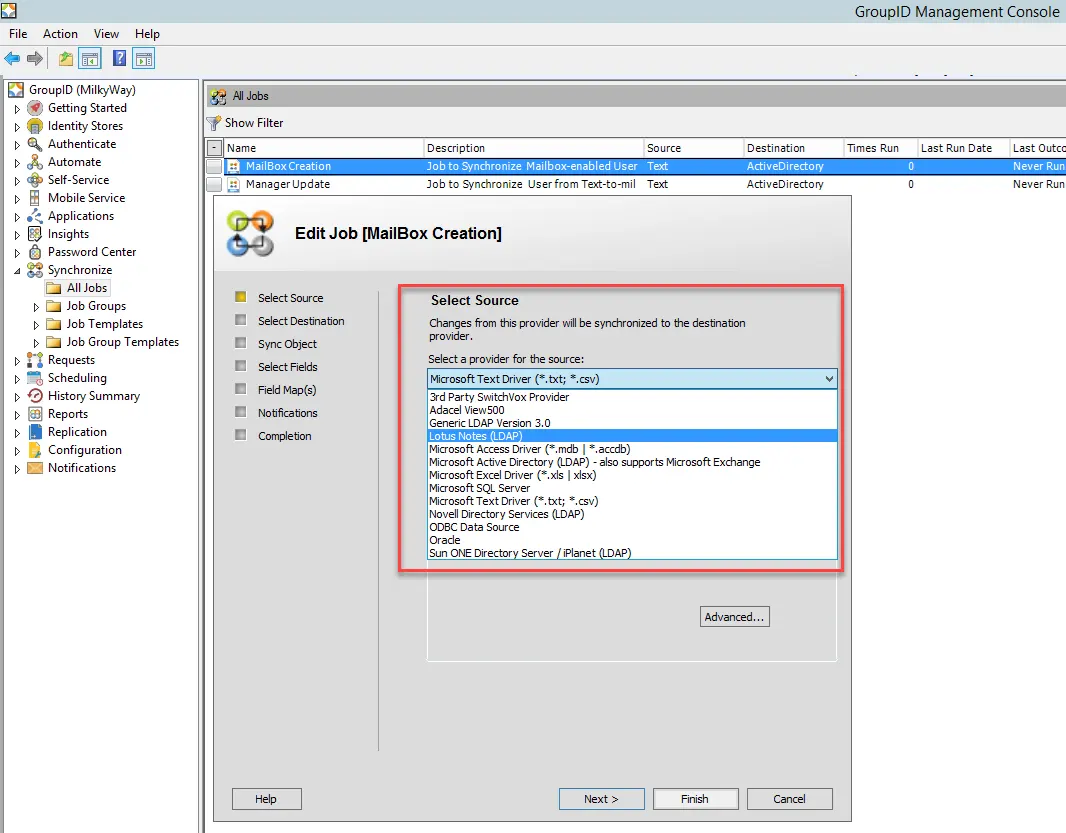
GroupID Synchronize supports the following third-party data sources:
- 3rd Party Switchvox Provider
- Adacel View500
- Generic LDAP version 3.0
- Lotus Notes (LDAP)
- Microsoft Access Driver (.mdb, .accdb)
- Microsoft Active Directory (LDAP)
- Microsoft Excel Driver (.xls, .xlsx)
- Microsoft SQL Server
- Microsoft Text Driver (.txt, .csv)
- Novell Directory Services (LDAP)
- ODBC Data Source
- Oracle
- Sun ONE Directory Server/iPlanet (LDAP)
Microsoft Text Driver (.txt, csv) and Adacel View500 are not supported as destination providers.
Synchronize GUI
Let’s look at a few screenshots depicting the Synchronize GUI.
- The following screenshot shows the providers that can be used as a data source in a Synchronize job.
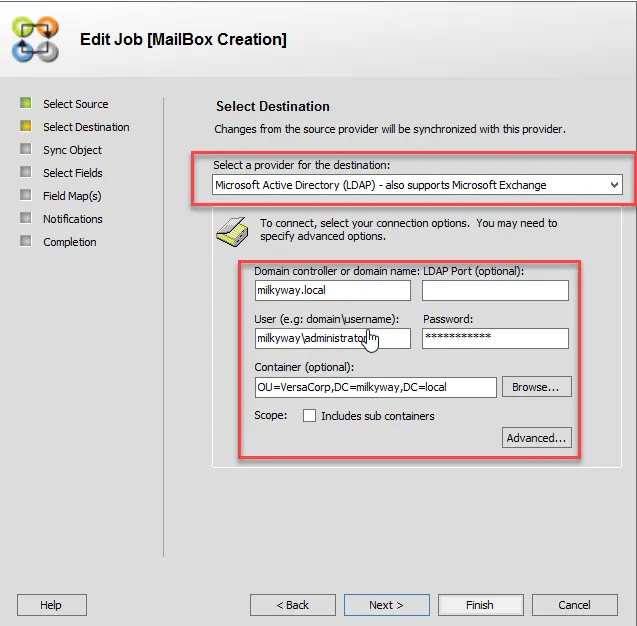
- In the following screenshot, we have shown that Active Directory has been selected as the destination provider for the creation of user, contact, mailbox, and external mail-enabled user objects. As a source provider, we can use simple (text or CSV) to complex data stores (e.g., Microsoft SQL Server or Oracle Server).
- The following screenshot shows that you can choose to create different objects (such as mailbox-enabled users, mail-enabled users, and contacts) at the destination. You can also update these objects when there is a change in the source provider for those users in AD.
- The Create option button enables you to create the respective objects at the destination.
- The Skip option button enables you to update the respective objects at the destination.

Conclusion
In this blog, we started with a scenario of user account creation handed over to IT and they had the most basic tool – ADUC or ADAC – to accomplish this task. Then we talked about performing the same task using PowerShell’s New-ADUser cmdlet and its most used parameters. We also discussed the creation of a single user, the creation of multiple users from a CSV source, and the need of creating users from a template. Lastly, we have discussed GroupID Synchronize for performing the same task by automating it on a large scale, with supported source and destination providers.
Jonathan Blackwell
View ProfileSince 2012, Jonathan Blackwell, an engineer and innovator, has provided engineering leadership that has put GroupID at the forefront of group and user management for Active Directory and Azure AD environments. His experience in development, marketing, and sales allows Jonathan to fully understand the Identity market and how buyers think.